JavaScript Capstone Exercise
lets create an interactive, dynamic UI that fetches users from an API and displays their information
- I'm going to cap this entire chapter on JavaScript here. if you've been following along, you now have the fundamentals and tools to really go nuts and build some awesome stuff. of course, there is more to learn (there always is) but in my humble opinion it is time to move on to more professional tools using libraries and frameworks. libraries and frameworks shouldn't intimidate you, it should excite you because it makes a lot of what I have shown easier. this was the hard stuff, especially if you really started from scratch. pretty fucking cool.
- ok lets do it, lets build a UI that will fetch and display users from a real API using HTML, CSS and vanilla JavaScript. I'll of course provide all of the code but try to play around with it and change some things
- ok lets get into it and create our files in the terminal
$ # make a folder
$ mkdir js-capstone
$ # change into new folder
$ cd js-capstone
$ # create all three files with one command
$ touch index.html styles.css script.js
$ # open the folder
$ . open- bring those files into VS Code
- in case you skipped the flexbox section, I recommend using the Live Server (opens in a new tab) VS Code plugin to launch a local server for your project
- bootstrap that HTML file
<!DOCTYPE html>
<html lang="en">
  <head>
    <meta charset="UTF-8" />
    <title>Users</title>
  </head>
  <body>
    <h1>Users:</h1>
  </body>
</html>- connect the CSS and JS files
<!DOCTYPE html>
<html lang="en">
  <head>
    <meta charset="UTF-8" />
    <title>Users</title>
    <link rel="stylesheet" href="styles.css" />
    <script defer src="script.js"></script>
  </head>
  <body>
    <h1>Users:</h1>
  </body>
</html>- lets pretty up the place with some CSS
body {
  background-color: #1e2429;
}

h1,
h2,
p {
  font-family: "Helvetica", sans-serif;
  color: #cbcbcb;
}

a {
  color: #9474f4;
}-
so, there are some real "fake" APIs out there. they are real because they are live APIs that allow you to perform all HTTP methods. they are fake because they are for learning and testing, we aren't going to hack and tap into anyone's actual databases here. there are some cool ones too, this one (opens in a new tab) lets you create a full blown e-commerce store. we could've used this one since we just want to grab the users but I actually also really like this one, https://jsonplaceholder.typicode.com/ (opens in a new tab). its a little simpler and the actual endpoint is not minified, meaning you can see the shape of the data a little more clearly. seeing the shape of the data you will be working with is pretty important, there are some useful tools like postman (opens in a new tab), which is an industry standard for building and testing APIs (totally unnecessary for now but cool to know)
-
so our base URL is https://jsonplaceholder.typicode.com/ (opens in a new tab) and our endpoint is https://jsonplaceholder.typicode.com/users (opens in a new tab). check it out, we have an array of objects with 10 users and a bunch of information on them
-
lets start to fetch those users into our UI. first we will create an
asyncfunction, call itfetchUsers, and create the response from the promise of a GET request to the API endpoint
const fetchUsers = async () => {
  const response = await fetch("https://jsonplaceholder.typicode.com/users");
};- lets make sure the response is ok, we can
console.log()to make sure everything is cool so far (this is really whatconsole.log()is for). we'll also want to call the function so that it will run when the page loads
const fetchUsers = async () => {
  const response = await fetch("https://jsonplaceholder.typicode.com/users");
  console.log(response.ok);
};

fetchUsers();- open up the dev tools in your browser (
ctrl+shift+ion windows,command+option+ion mac), go to the JSconsoletab and you should see the wordtrue - if you are curious, change that
console.log()to show you the HTTP status code, you should see the number 200 in the browser console, which indicates "success"
const fetchUsers = async () => {
  const response = await fetch("https://jsonplaceholder.typicode.com/users");
  console.log(response.status);
};

fetchUsers();- ok
response.okandresponse.statuslook good, lets tap the users out of the body of the response with.json()
const fetchUsers = async () => {
  const response = await fetch("https://jsonplaceholder.typicode.com/users");
  const users = await response.json();
  console.log(users);
};

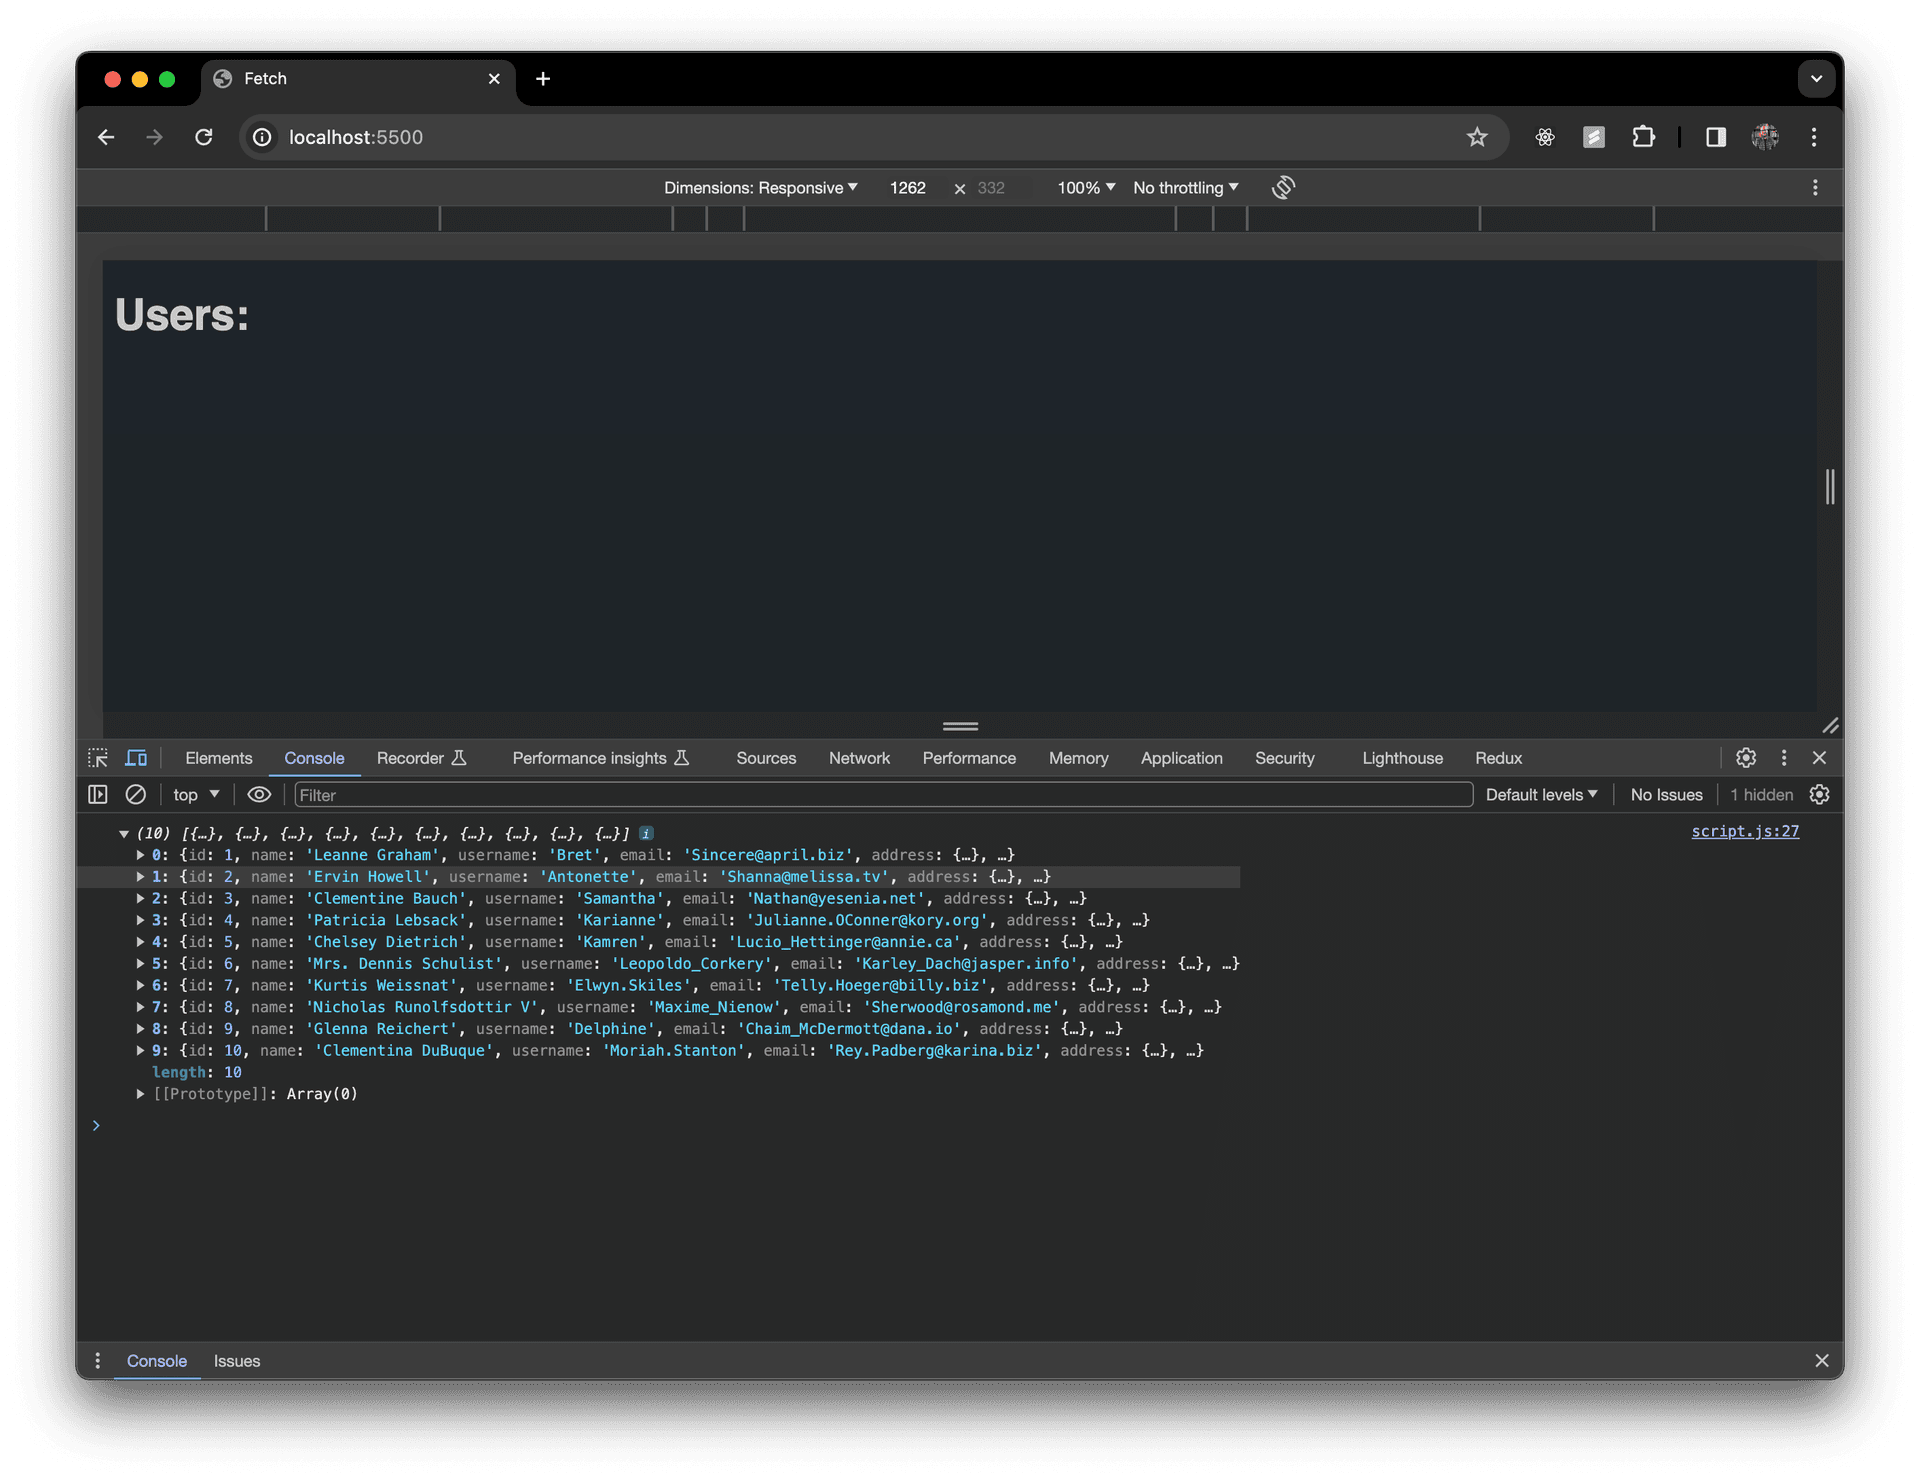
fetchUsers();- back to the browser in dev tools, you should see the number 10 in parentheses and something that represents an array of objects with a little arrow next to it, click that little arrow to open it up. depending on your browser, it should look something like this:

- our code is working, that is awesome. lets clear out the
console.log()'s and do some error handling and wrap the response in atry / catchbecause we are fucking professionals
const fetchUsers = async () => {
  try {
    const response = await fetch("https://jsonplaceholder.typicode.com/users");
    if (!response.ok) {
      throw new Error("Failed to fetch users");
    }
    const users = await response.json();
  } catch (error) {
    console.error("Error:", error);
  }
};

fetchUsers();- ok so now we want to actually display the users on our UI. first step is to give them somewhere to go in the HTML file, add this empty
divwith theid"users-container":
<!DOCTYPE html>
<html lang="en">
  <head>
    <meta charset="UTF-8" />
    <title>Users</title>
  </head>
  <body>
    <h1>Users:</h1>
    <div id="users-container"></div>
  </body>
</html>- back in our JS file, we need to create a function that will display the users:
const fetchUsers = async () => {
  try {
    const response = await fetch("https://jsonplaceholder.typicode.com/users");
    if (!response.ok) {
      throw new Error("Failed to fetch users");
    }
    const users = await response.json();
  } catch (error) {
    console.error("Error:", error);
  }
};

const displayUsers = (users) => {
  const usersContainer = document.getElementById("users-container");
};

fetchUsers();- we are targeting that HTML
idwith the JS DOM methoddocument.getElementById(). the data we are working with is an array of objects, which means we can use array methods, I'm going to use forEach to pick out all of the individual elements (each user).
const fetchUsers = async () => {
  try {
    const response = await fetch("https://jsonplaceholder.typicode.com/users");
    if (!response.ok) {
      throw new Error("Failed to fetch users");
    }
    const users = await response.json();
  } catch (error) {
    console.error("Error:", error);
  }
};

const displayUsers = (users) => {
  const usersContainer = document.getElementById("users-container");
  users.forEach((user) => {
    const userElement = document.createElement("div");
    userElement.classList.add("user");
    userElement.innerHTML = `
        <h2><u>${user.name}</u></h2>
        <p><i>Email:</i> <a href="mailto:${user.email}">${user.email}</a></p>
        <p><i>Phone:</i> ${user.phone}</p>
        <p><i>Company:</i> ${user.company.name}</p>
        <p><i>Website:</i> <a href="http://${user.website}" target="_blank">${user.website}</a></p>
      `;
    usersContainer.appendChild(userElement);
  });
};

fetchUsers();- big chunk of code. FYI this entire function is something that React will make easier for us but now now; this chunk of code is iterating over the users in our fetched data of users and creating new
divelements for each individual user, creating a class for the users and then injecting some HTML. within the HTML that we are injecting, we are accessing the user details by drilling into the user object using a simple technique called dot notation. then finally we append the user element to the container, which actually places the user's details into the webpage - now we have to add this function into our
fetchUsersfunction
const fetchUsers = async () => {
  try {
    const response = await fetch("https://jsonplaceholder.typicode.com/users");
    if (!response.ok) {
      throw new Error("Failed to fetch users");
    }
    const users = await response.json();
    displayUsers(users);
  } catch (error) {
    console.error("Error:", error);
  }
};

const displayUsers = (users) => {
  const usersContainer = document.getElementById("users-container");
  users.forEach((user) => {
    const userElement = document.createElement("div");
    userElement.classList.add("user");
    userElement.innerHTML = `
        <h2><u>${user.name}</u></h2>
        <p><i>Email:</i> <a href="mailto:${user.email}">${user.email}</a></p>
        <p><i>Phone:</i> ${user.phone}</p>
        <p><i>Company:</i> ${user.company.name}</p>
        <p><i>Website:</i> <a href="http://${user.website}" target="_blank">${user.website}</a></p>
      `;
    usersContainer.appendChild(userElement);
  });
};

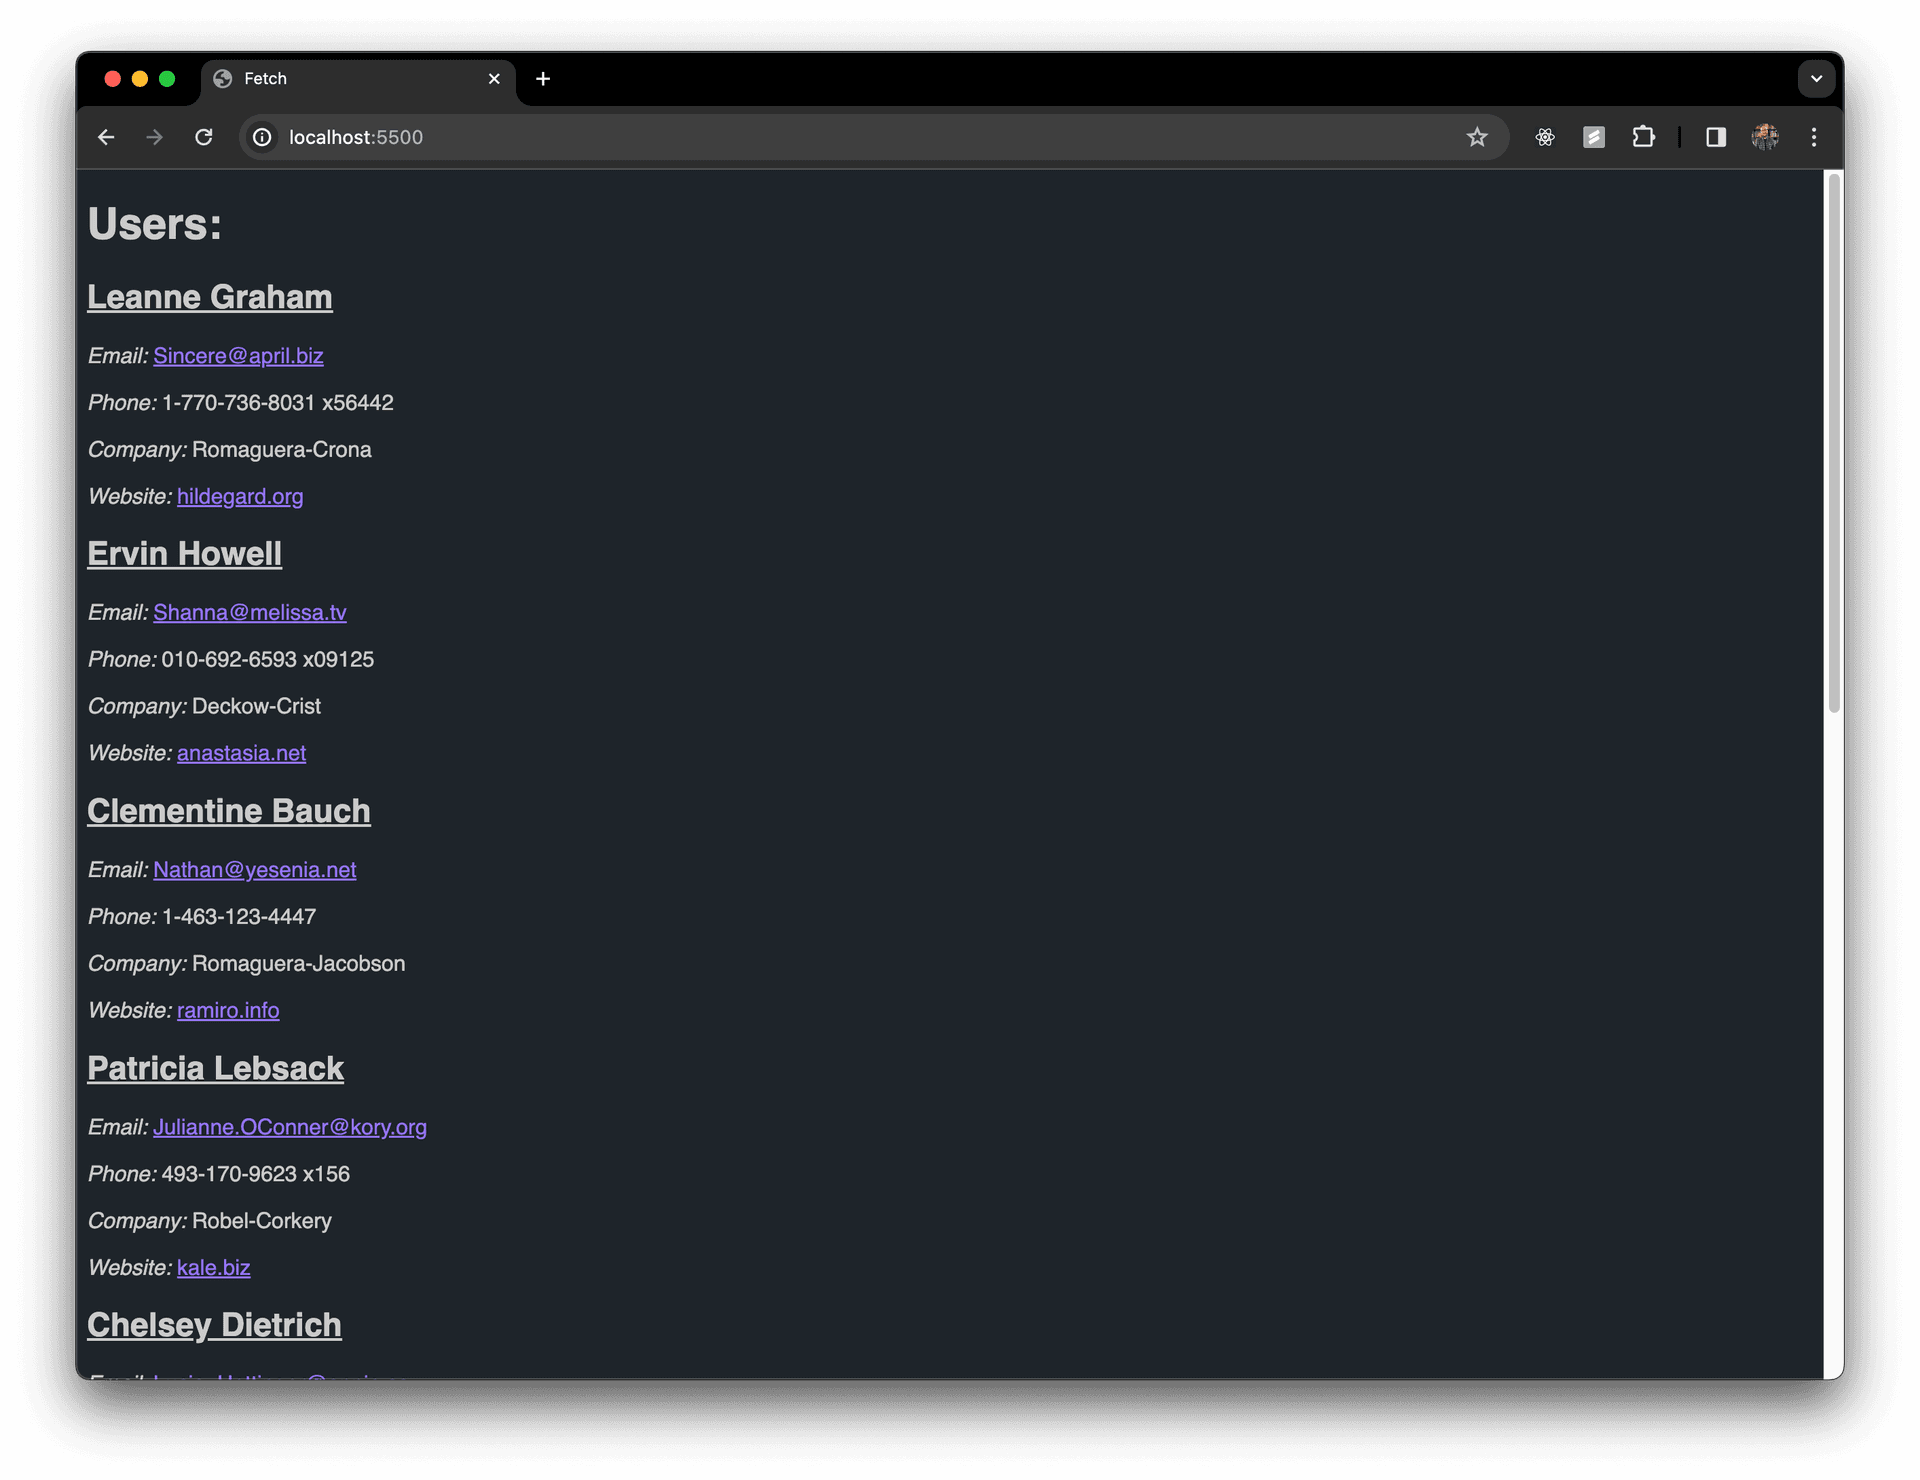
fetchUsers();- make sure all your files are saved and check out your browser. close your dev tools (the same way you open them) and you should see something like this:

- sick! the hard part is done! we are rendering dynamic data from an API to a user interface. that is huge. its dynamic because if the users in the API changes, so will our UI because it is not hard coded 👌
- I want to do two more things before we close this out to really make it nice. I want to make the users info a little easier on the eyes and I want to add a button that will display the users
- first lets add another container to our HTML:
<!DOCTYPE html>
<html lang="en">
  <head>
    <meta charset="UTF-8" />
    <title>Users</title>
  </head>
  <body>
    <h1>Users:</h1>
    <div class="users-flex-container">
      <div id="users-container"></div>
    </div>
  </body>
</html>- and add this CSS:
body {
  background-color: #1e2429;
}

h1,
h2,
p {
  font-family: "Helvetica", sans-serif;
  color: #cbcbcb;
}

a {
  color: #9474f4;
}

.user {
  margin-bottom: 20px;
  padding: 10px;
  border: 1px solid #969595;
  border-radius: 25px;
}

.users-flex-container {
  display: flex;
  justify-content: center;
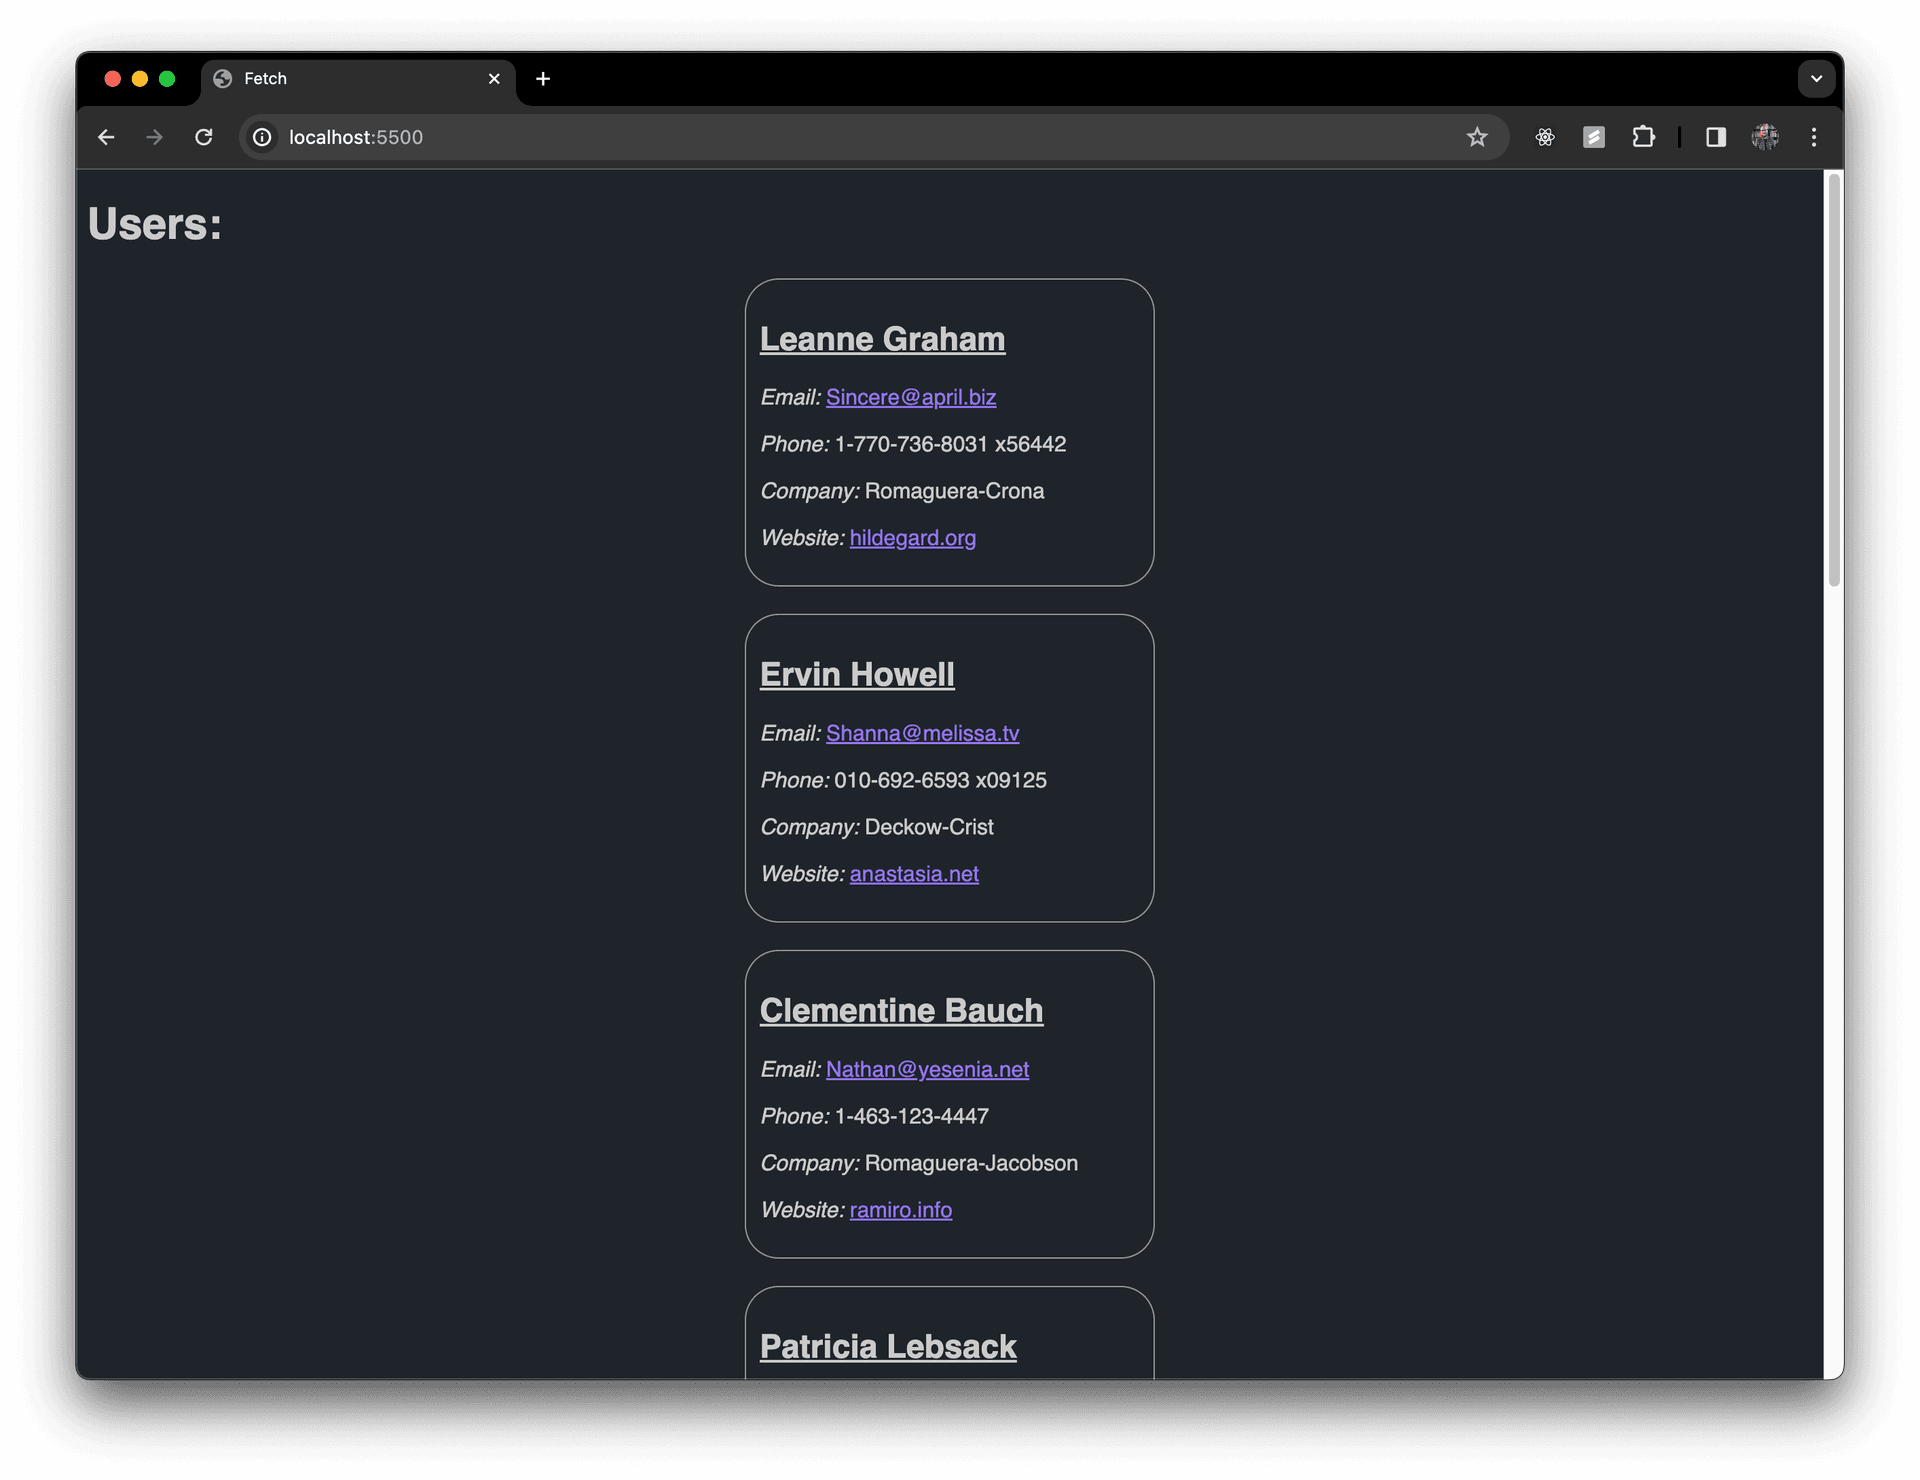
}- thats a little better, right?

- lets add the button. this will give the UI a little interactivity and will look real slick. I'll also give you a dope button to play around with
- lets add the button to the HTML:
<!DOCTYPE html>
<html lang="en">
  <head>
    <meta charset="UTF-8" />
    <title>Users</title>
  </head>
  <body>
    <h1>Users:</h1>
    <div class="users-flex-container">
      <button id="fetch-users-btn">Fetch Users</button>
      <div id="users-container"></div>
    </div>
  </body>
</html>- add this CSS for the button:
body {
  background-color: #1e2429;
}

h1,
h2,
p {
  font-family: "Helvetica", sans-serif;
  color: #cbcbcb;
}

a {
  color: #9474f4;
}

.user {
  margin-bottom: 20px;
  padding: 10px;
  border: 1px solid #969595;
  border-radius: 25px;
}

.users-flex-container {
  display: flex;
  justify-content: center;
}

#fetch-users-btn {
  background-image: linear-gradient(
    92.88deg,
    #455eb5 9.16%,
    #5643cc 43.89%,
    #673fd7 64.72%
  );
  border-radius: 8px;
  border-style: none;
  color: #ffffff;
  cursor: pointer;
  flex-shrink: 0;
  font-family: "Helvetica", sans-serif;
  font-size: 16px;
  font-weight: 500;
  height: 4rem;
  padding: 0 1.6rem;
  text-align: center;
  text-shadow: rgba(0, 0, 0, 0.25) 0 3px 8px;
  transition: all 0.5s;
  touch-action: manipulation;
}

#fetch-users-btn:hover {
  box-shadow: #503fcd80 0 1px 30px;
  transition-duration: 0.1s;
}

@media (min-width: 768px) {
  #fetch-users-btn {
    padding: 0 2.6rem;
  }
}- ok now we have some modifications to make to the JS script. at the bottom of our script, either comment out or delete the
fetchUsers()function call and replace it with this:
const fetchUsers = async () => {
  try {
    const response = await fetch("https://jsonplaceholder.typicode.com/users");
    if (!response.ok) {
      throw new Error("Failed to fetch users");
    }
    const users = await response.json();
    displayUsers(users);
  } catch (error) {
    console.error("Error:", error);
  }
};

const displayUsers = (users) => {
  const usersContainer = document.getElementById("users-container");
  users.forEach((user) => {
    const userElement = document.createElement("div");
    userElement.classList.add("user");
    userElement.innerHTML = `
        <h2><u>${user.name}</u></h2>
        <p><i>Email:</i> <a href="mailto:${user.email}">${user.email}</a></p>
        <p><i>Phone:</i> ${user.phone}</p>
        <p><i>Company:</i> ${user.company.name}</p>
        <p><i>Website:</i> <a href="http://${user.website}" target="_blank">${user.website}</a></p>
      `;
    usersContainer.appendChild(userElement);
  });
};

// fetchUsers();

document.addEventListener("DOMContentLoaded", () => {
  const fetchButton = document.getElementById("fetch-users-btn");
  fetchButton.addEventListener("click", fetchUsers);
});- we are adding an event listeners for when the page loads, grabbing the button by its
idand another event listener for the button click to call thefetchUsersfunction instead of just running thefetchUsersfunction when the page loads - we have one more trick up our sleeves. lets now hide the button once
fetchUsersruns. we can target the button inside thefetchUsersfunction by itsidand change its display tonone:
const fetchUsers = async () => {
  try {
    const response = await fetch("https://jsonplaceholder.typicode.com/users");
    if (!response.ok) {
      throw new Error("Failed to fetch users");
    }
    const users = await response.json();
    displayUsers(users);
    document.getElementById("fetch-users-btn").style.display = "none";
  } catch (error) {
    console.error("Error:", error);
  }
};

const displayUsers = (users) => {
  const usersContainer = document.getElementById("users-container");
  users.forEach((user) => {
    const userElement = document.createElement("div");
    userElement.classList.add("user");
    userElement.innerHTML = `
        <h2><u>${user.name}</u></h2>
        <p><i>Email:</i> <a href="mailto:${user.email}">${user.email}</a></p>
        <p><i>Phone:</i> ${user.phone}</p>
        <p><i>Company:</i> ${user.company.name}</p>
        <p><i>Website:</i> <a href="http://${user.website}" target="_blank">${user.website}</a></p>
      `;
    usersContainer.appendChild(userElement);
  });
};

// fetchUsers();

document.addEventListener("DOMContentLoaded", () => {
  const fetchButton = document.getElementById("fetch-users-btn");
  fetchButton.addEventListener("click", fetchUsers);
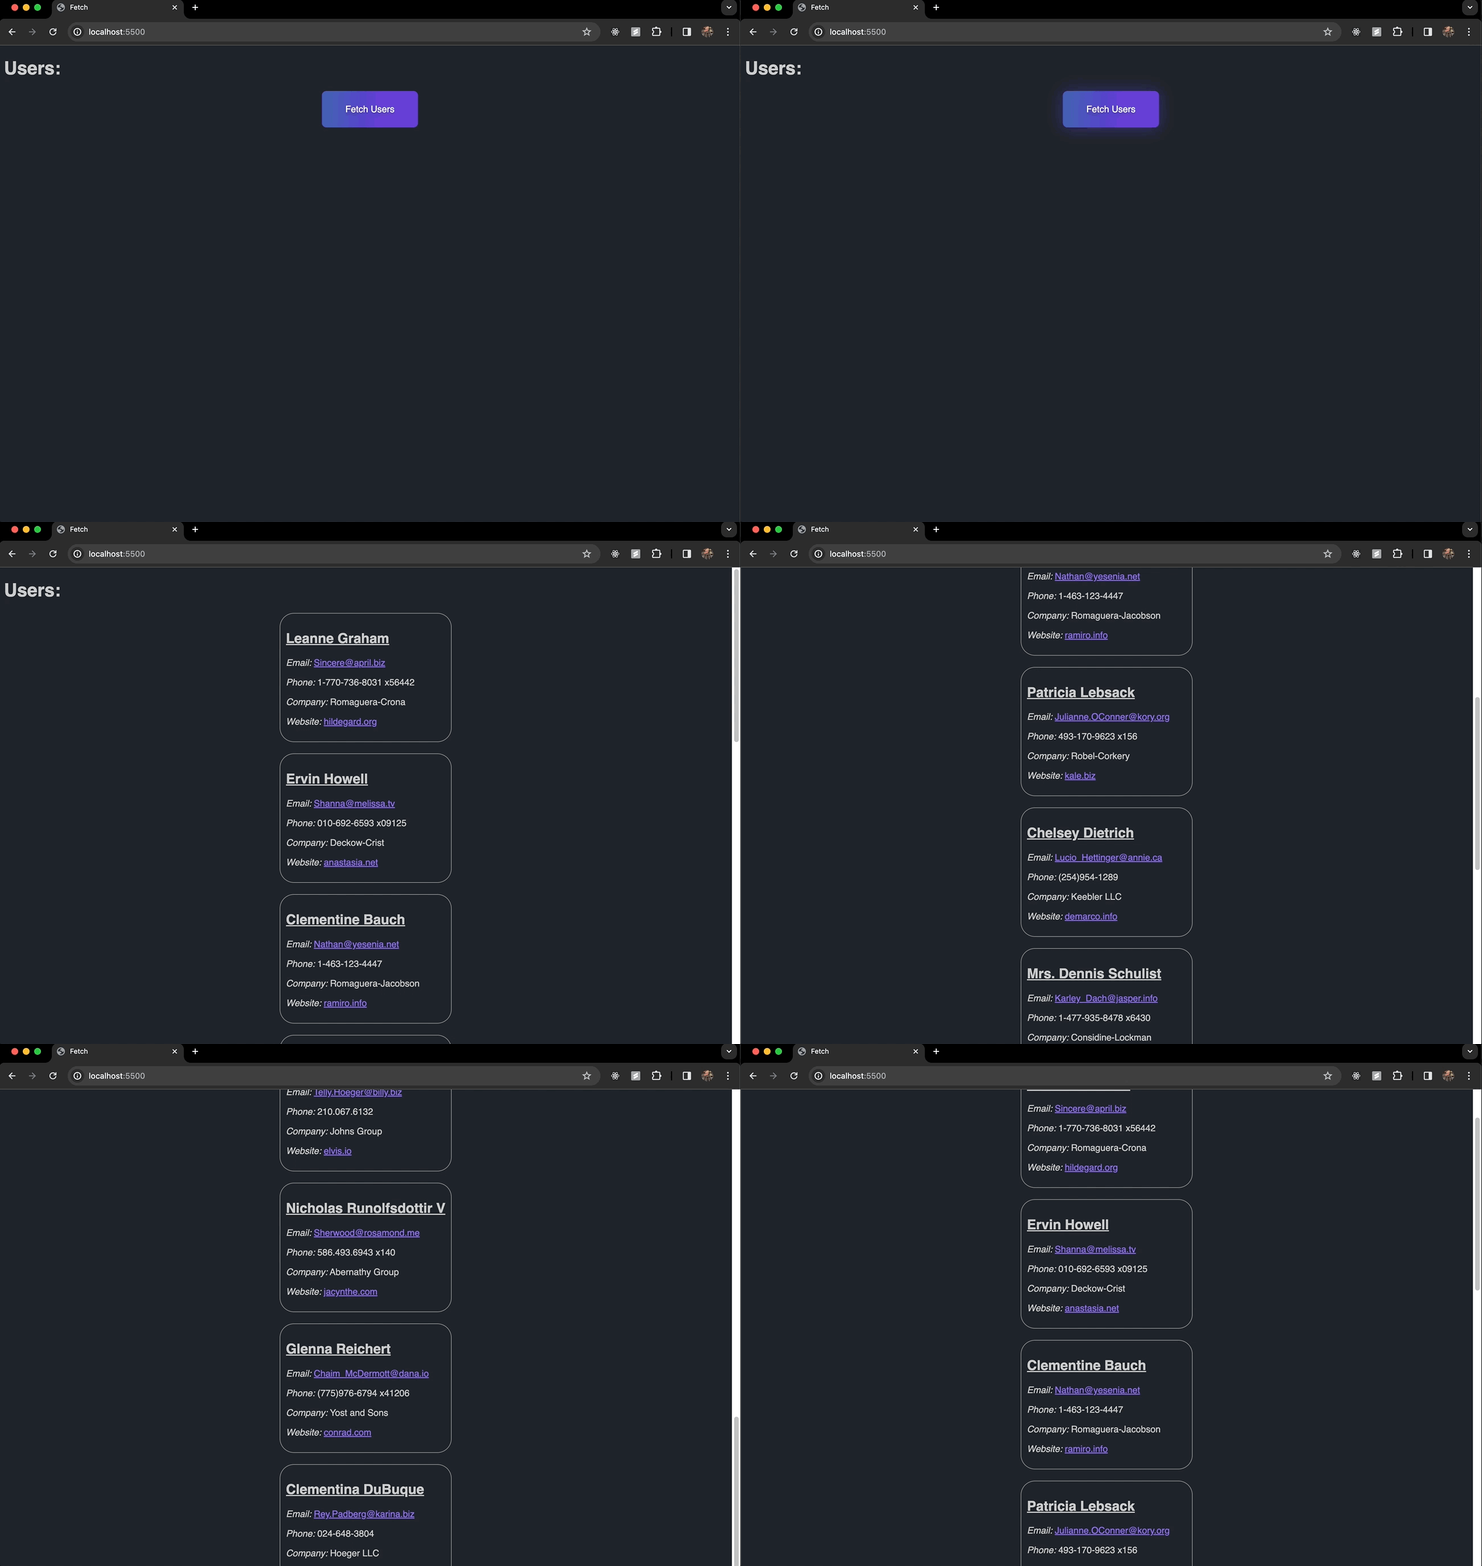
});- save all your files and you should have this:

- if you have this up and working locally (on your computer) that is fucking awesome. congratulations! this was a lot. if you got lost or anything tangled I'll provide the final code to all three files below, just copy and paste all of the code. play around with it, change the colors, break it and put it back together different, thats what engineering is
- in the next section I'll show you how you can get this UI on the internet and use GitHub then we can finally get into React!
Final Code:
<!DOCTYPE html>
<html lang="en">
  <head>
    <meta charset="UTF-8" />
    <title>Fetch</title>

    <link rel="stylesheet" href="styles.css" />

    <script defer src="script.js"></script>
  </head>
  <body>
    <h1>Users:</h1>
    <div class="users-flex-container">
      <button id="fetch-users-btn">Fetch Users</button>
      <div id="users-container"></div>
    </div>
  </body>
</html>body {
background-color: #1e2429;
}
h1,
h2,
p {
font-family: "Helvetica", sans-serif;
color: #cbcbcb;
}
a {
color: #9474f4;
}
.user {
margin-bottom: 20px;
padding: 10px;
border: 1px solid #969595;
border-radius: 25px;
}
.users-flex-container {
display: flex;
justify-content: center;
}
#fetch-users-btn {
background-image: linear-gradient(
92.88deg,
#455eb5 9.16%,
#5643cc 43.89%,
#673fd7 64.72%
);
border-radius: 8px;
border-style: none;
color: #ffffff;
cursor: pointer;
flex-shrink: 0;
font-family: "Helvetica", sans-serif;
font-size: 16px;
font-weight: 500;
height: 4rem;
padding: 0 1.6rem;
text-align: center;
text-shadow: rgba(0, 0, 0, 0.25) 0 3px 8px;
transition: all 0.5s;
touch-action: manipulation;
}
#fetch-users-btn:hover {
box-shadow: #503fcd80 0 1px 30px;
transition-duration: 0.1s;
}
@media (min-width: 768px) {
#fetch-users-btn {
padding: 0 2.6rem;
}
}const fetchUsers = async () => {
try {
const response = await fetch("https://jsonplaceholder.typicode.com/users");
if (!response.ok) {
throw new Error("Failed to fetch users");
}
const users = await response.json();
displayUsers(users);
document.getElementById("fetch-users-btn").style.display = "none";
} catch (error) {
console.error("Error:", error);
}
};
const displayUsers = (users) => {
const usersContainer = document.getElementById("users-container");
users.forEach((user) => {
const userElement = document.createElement("div");
userElement.classList.add("user");
userElement.innerHTML = `
<h2><u>${user.name}</u></h2>
<p><i>Email:</i> <a href="mailto:${user.email}">${user.email}</a></p>
<p><i>Phone:</i> ${user.phone}</p>
<p><i>Company:</i> ${user.company.name}</p>
<p><i>Website:</i> <a href="http://${user.website}" target="_blank">${user.website}</a></p>
`;
usersContainer.appendChild(userElement);
});
};
// fetchUsers();
document.addEventListener("DOMContentLoaded", () => {
const fetchButton = document.getElementById("fetch-users-btn");
fetchButton.addEventListener("click", fetchUsers);
});